In a follow-on to my cheap DIY store front panels post a few weeks back I used anodised aluminium angle strips in the construction from Homebase - the case is bigger than the 6U 84HP of the rack kit.
(Note to non-UK readers Halfords is a motor accessories store and Homebase is a DIY store)
Here's the case
Prep the case - remove separators, tool panel and unecessary fixings.
All done, ready to start serious modding
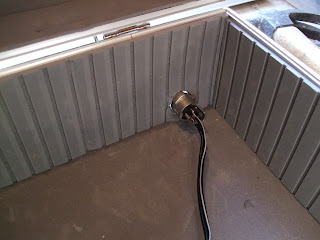
This will be powered by a 15VAC supply so a nice big hole for an XLR connector
XLR in place (EDIT: this is eventually replaced by a plug version as a power lead with exposed pins is bad karma)
A bit of judiscious foam cutting to neaten it up
Markout and drill the regulator boards fixing points - 4 x M3
Regulator screwed in place
I used M3 washers to spread the load - the case is just hardboard with a thin aluminium veneer
Position the bus boards and drill mounting holes - long M3 screws with tapped spacers fitted
All electrics now in place. Note this is temporary - there will be wiring to a front panel power switch on the next installment!
Next make the rack end pieces out of 10mm x 20mm anodised aluminium angle strip. These make the rack the perfect width to fit the case.
Similar to above I made top and bottom strips to fill the gap - I used 25mm x 25mm anodised angle, again an almost exact height fit - starting to look good.
Here's a view showing the fixings (ok I drilled a hole in the wrong place. Motto: measure twice, cut once!!!).
As I said a near perfect fit in the case. At this point just resting on the foam and not screwed in. That's in the next installment.
Loaded with modules and powered up. Take no notice of the modules selection, I've since changed it to a more coherent set.
Even a nifty scope showing VCOs, Synovatron DioDe and CV Tools in operation - now that's a waveform!
Here's a short clip of it working:-


